Page 1 of 2
Getting closer to first print, Z axis issue...
Posted: Mon Feb 16, 2015 5:30 pm
by mhackney
I've made a little progress. For reference, here is the thing I'm printing:http://www.thingiverse.com/thing:337955
I scale it so it is about 23mm in diameter. After centering the image properly I ran another print and now it is starting to look less like an amorphous blob! But I still have issues. Here are some photos - I terminated the print at about 75% complete:
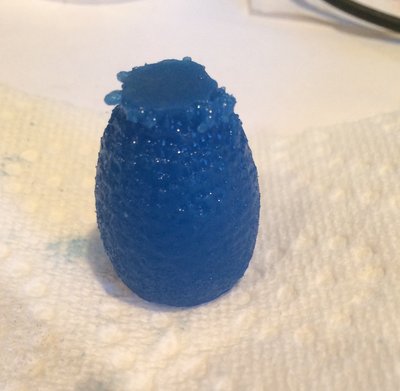
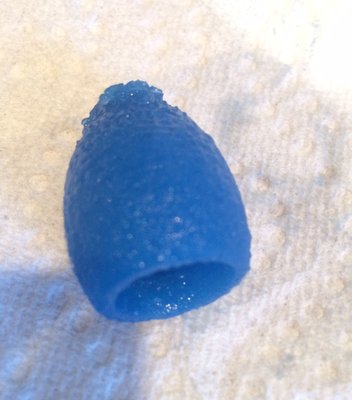
As you can see, Z is elongated. However, when I jog say 10mm I actually measure 10mm of movement, and it matches the steps per calculation. Perhaps I am missing the meaning of Z in the printer configuration tab. I have it set to 150. I presumed that to mean I have 150mm of travel but perhaps it is a scaling factor.
Is there a way to tell from these (horrible) photos if the exposure is even in the ballpark? With Z axis stretching I would have expected the holes to be even more prevalent but instead the object is a solid shell. Is this an artifact of over exposure?
I am completely new to the SLA printer world so any help is greatly appreciated!
cheers,
Michael
Re: Getting closer to first print, Z axis issue...
Posted: Mon Feb 16, 2015 6:24 pm
by PacManFan
It looks like you're having a few problems:
first, the model looks very over-exposed - try lowering your exposure time by 1/2.
second, if the z-axis is indeed jogging 10mm when you click the 10mm button, then the X/Y scale must be set incorrectly. Measure the projected X/Y image on the surface of the vat, and enter those numbers into your Machine Configuration screen. Also, be sure to check the projector resolution is set correctly.
It looks like you're very close...
-Steve
Re: Getting closer to first print, Z axis issue...
Posted: Mon Feb 16, 2015 7:14 pm
by mhackney
Steve, this is exactly the type of experienced advice I need! I thought overexposure but with no experience I couldn't be sure.
On the resolution - excellent, I hadn't considered that Z was correct but X/Y might be wrong! I guess the best way to do this is to make a calibration STL that I know the size of to measure.
Regards,
Michael
Re: Getting closer to first print, Z axis issue...
Posted: Mon Feb 16, 2015 8:12 pm
by mhackney
Steve, you called it on X/Y calibration being off.
I think I "get it" with X/Y resolution now. I didn't take into account that the scaling depends on projector zoom AND the distance the lens is to the surface of the PMS. So, I thought that setting my X to 102.4 and Y to 76.8 I would have 100 micron resolution. But, with my setup, the actual measured X/Y for a 20mm diameter cylinder was 13.2mm, so the values need to be
for X: 13.2/20 * 102.4 = 67.6
for Y: 13.2/20 * 76.8 = 50.7
This is 66 micron resolution.
I've decreased my exposure to 2500ms for first layers and 500ms for layers - divided the original by 2. I'm running a test now to see how that goes. But I think I "get it" for exposure too. If I'm overexposed, too much resin converts to solid. If under, too little. There is a happy intermediate ground there that I suppose becomes "intuitive" with experience.
Re: Getting closer to first print, Z axis issue...
Posted: Mon Feb 16, 2015 8:40 pm
by PacManFan
Be sure to post more pictures of your prints. What resin are you printing with? If it's the blue makerjuice, then you might need a 1000ms exposure. Also, what slice thickness?
-S
Re: Getting closer to first print, Z axis issue...
Posted: Mon Feb 16, 2015 9:01 pm
by mhackney
Getting closer! Now I've got the resolution good. I'm using blue MakerJuice G+ slicing .1mm layer height.
Here's the latest after reducing exposures to 2500/500ms and fixing the X/Y resolution:
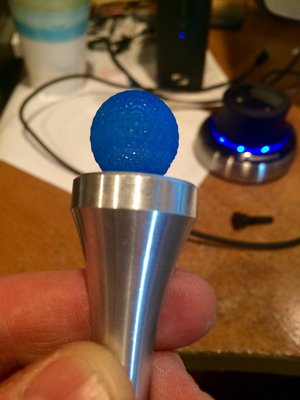
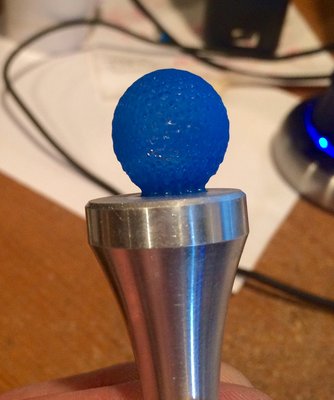
It is starting to show some definition and the open structure. I don't have IPA to wash so I washed with denatured ethanol. I also didn't UV or sunlight treat this. As it "cured" over the last 10 minutes or so, the definition seems to be getting better and more pots seem to be opening up. I presume this is normal - that the prints "develop" a bit after coming out of the machine? Would you say it is still a little overexposed? I'm also not sure how to go about tuning Z lift and speeds, etc because I don't yet know what to expect when I make a change. But I do seem to be moving in the right direction!
cheers,
Michael
Re: Getting closer to first print, Z axis issue...
Posted: Tue Feb 17, 2015 12:22 am
by PacManFan
Looks like you're almost there. Still a little over - exposed. You might want to turn down the brightness of the projector itself to 50-75% so the resin cures slower overall. The blue makerjuice is a very reactive resin. You should definitely go pick up some Isopropyl. Let the model soak for a good 5-10 minutes and agitate it to wash off any uncured resins.
-S
Re: Getting closer to first print, Z axis issue...
Posted: Tue Feb 17, 2015 9:22 am
by mhackney
I usually have a gallon of IPA (and several 6 packs too) around but ran out last week. Picking some up today.
I'll have today into my projector manual to see how to decrease brightness. I also have the MJ G+ in all of the available colors. Is another color a better place to being?
Re: Getting closer to first print, Z axis issue...
Posted: Tue Feb 17, 2015 10:07 am
by mhackney
My projector was at 50% brightness. It is an Acer P1273 with the UV filter and color wheel removed. 3000 lumens, 17000:1 contrast and 1024x768 resolution. I turned the brightness down to 30% and I'll reprint with the same exposure to test. It is very difficult to change projector parameters looking at the small project image on my vat!
Re: Getting closer to first print, Z axis issue...
Posted: Tue Feb 17, 2015 4:32 pm
by mhackney
Getting ever closer...
I turned down brightness from 50% to 30% and increased the part diameter to ~30mm. I'm guessing based on what little I know that this is still over exposed.
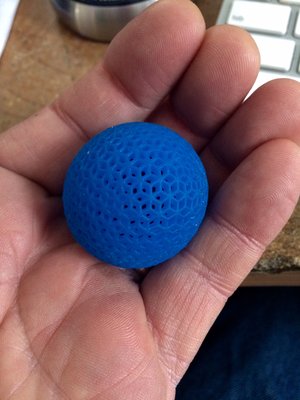
I've turned down the brightness to 25% and trying another run. But, I am interested in why my projector would need to be lowered this much (or more). I thought more UV the better? I removed the UV filter and color wheel on this projector, was that a mistake? I haven't tried any of the other colors (I have all of the G+ colors).